In part one and two of our Making-of VINES series (you can read part 1 here) we already talked about filming and some aspects of postproduction. This blog post will cover the elaborate process of creating the VFX for VINES. I will give detailed information about the problems that occurred and how I have fixed them. If you have not watched VINES yet, you can see it here or at the end of this article.
This project called for several different disciplines of Visual Effects. It contained 3D Modeling, Animation, Matchmoving, Compositing as well as Retouching. In most cases, these are separate jobs themselves. For this project, we did all of it alone.
All 3D work was done inside Maxon Cinema 4D R18 (C4D), for compositing we used Adobe After Effects CS6 (AE). The embedded VFX breakdown will give you a quick overview of the VFX in VINES.
First Animation Tests
First, we had to find out, if we were able to bring the images we had in our heads into a 3D environment. A video of our first test can be seen here. In this test, as well as the first test shoot we talked about in part 1, the vines do work completely different from what you see in the final film. More about this later.
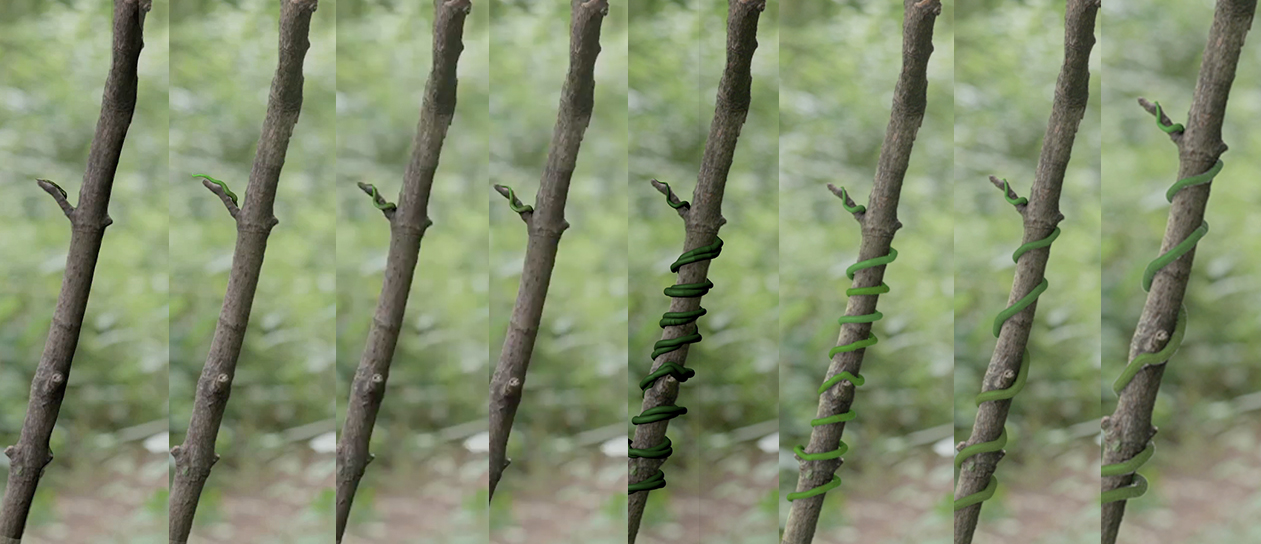
In these tests, the vines were created using several cylinders that were animated with the Spline Wrap Effector along a static spline. This worked for this kind of animation – dynamic vines were not possible that way. Our first try to bring additional movement to the vines did not go well. My only idea, at that time, to make the vines move and grow simultaneously, forced me to use Spline Dynamics. This part of the Hair Dynamics Tool is usually used to create ropes or cables. I attached the spline to the branch and to an invisible cube holding the top of the spline and pulling that part into the directions I wanted. This set-up was simple but had many shortcomings. The vine did not behave like you would expect from a plant and you barely had any controls over the animation itself.
What to think about while shooting with VFX
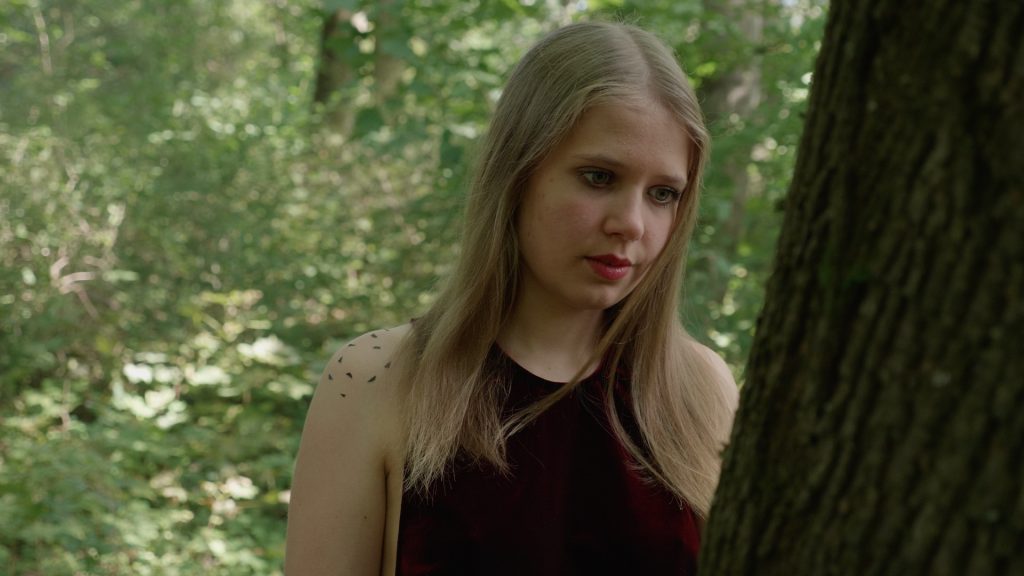
We took notes of the most important camera data while shooting, including focal length, aperture and sometimes the basic camera position. This was important, so we would be able to reconstruct the virtual camera movement later. The next thing we had to be aware of was the strength of the background blur. Opening the aperture all the way was not possible without losing the information you needed to track the shot. Another shot also called for tracking markers on our actress to be able to generate a Camera Tracking and an Object Tracking. For that, we used black tape that we cut into small pieces beforehand. It was easy to apply and it left no marks behind. These small triangles gave us enough clear points for a great object tracking.
VFX Workflow
A lot of thought was put into our VFX-Workflow. There is no right or wrong in this case, different projects require a different approach. You have to find the best workflow individually for every project. Ours looked like this:
- Export of the VFX shots with handle length and LUT
- Tracking/Matchmoving
- Design/Conception of the vines
- Modelling/Placement of tree and vines
- Animation
- Texturing, Light and Hair
- Grading of the plates (without VFX)
- (Adjustment of the VFX to the new plates)
- Rendering
- Compositing
- Final grading
Detailed Example: Branch
Our first shot with the CG-Vine was the Branch-Shot. It is a great example of our workflow because it features both static and dynamic vines. I am going to give a detailed description of this shot in the following paragraphs.
Motion Tracking inside C4D
Inserting a 3D element inside a moving plate requires you to track the shot beforehand. The branch itself featured great points to track. But if you wanted to get a good solve of the camera, the tracker needed good parallax movement in different distances of the shot.
![]() Overall, it was not possible to just use the “Automatic” tracking inside C4D, but that was not something we expected.
Overall, it was not possible to just use the “Automatic” tracking inside C4D, but that was not something we expected.
Giving the tracker enough information was achieved by searching points manually in the background and tracking them. If this was not possible, I moved the points by hand, frame by frame. Solving the camera perfectly was barely possible. But I was very happy with the overall performance of the C4D Tracker. It always delivered great results while making the work as comfortable as can be. The tracking of all of the shots required a lot of working hours and should not be underestimated.
The next step demanded me to rebuild the branch in 3D, so the vines could cast shadows onto the branch. Placing the branch inside the virtual workspace can prove to be quite difficult. The solved tracking points in the C4D viewport can be of help. If the model is not placed correctly inside the depth of the shot, the CG-Elements can appear to be jiggling later in the video.
A wonderful script called Douwe HairguidesTracer made by Douwe4D helped me a lot with placing the vines onto the branch. This script converts Hair Guides into Spline points. That way I was able to easily draw the splines onto the branch by using the Hair Guides Tool.
The Transition to Joints
The very first version of the Branch Shot was still using the old system of animation, by using Spline Dynamics. We decided to ditch that system after one day of painfully animating without any good results and put more time into developing another solution. This benefited both the film and our nerves.
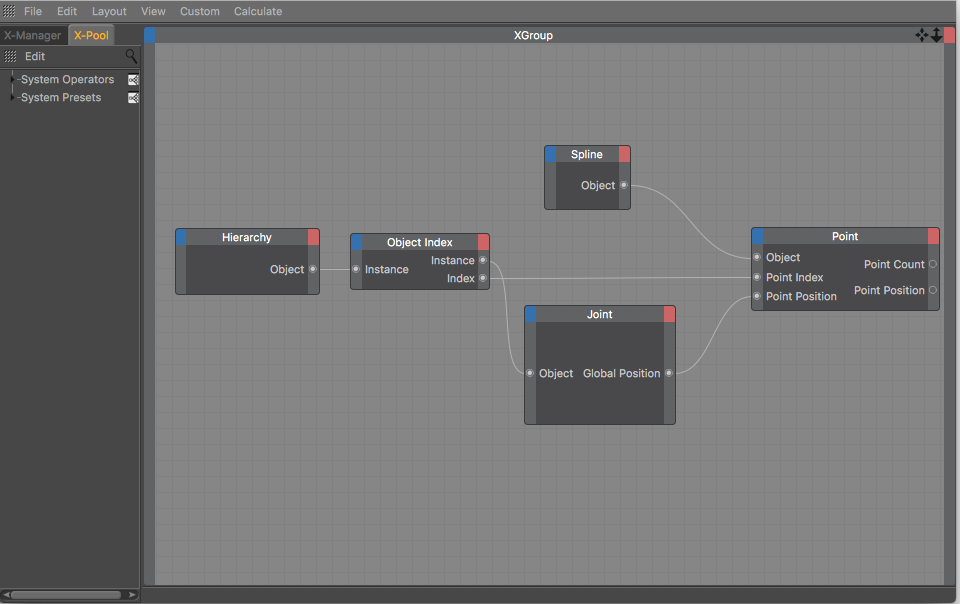
We knew the only way to actually animate the vine was by using joints. But we could not use “simple” character animation, because the vine was supposed to grow, not stretch. After searching for a long time, I found an XPresso Node System that connects spline points with joints if you generated these joints with a spline before. That way you can animate with joints, while also using the Spline Wrap Effector for the growth.
Texture and Light
After being satisfied with the animation, the next step was to design the surface of the vines. It did not require any UVW Unwrapping. We were able to create all of the materials in the Material Manager from C4D and add those to the model. We separated the static vines behind the branch into individual objects, to make an easier colour gradient.
But you can not assess the materials if the light in the scene is not correct. Creating the right light and environment was fairly easy. The Compositing tag from C4D is a huge help. With this tag, I was able to adjust which object emits light, casts shadows or generates reflections.
Having the light set up, we also activated Sub Surface Scattering (SSS). That gave us a beautiful plant-like effect. SSS simulates light entering translucent bodies and bouncing inside. Despite all of this, we were never really satisfied with the look of the vines, until Sören Schulz had the solution: tiny hair.
Placing Hair with a Vertex Map
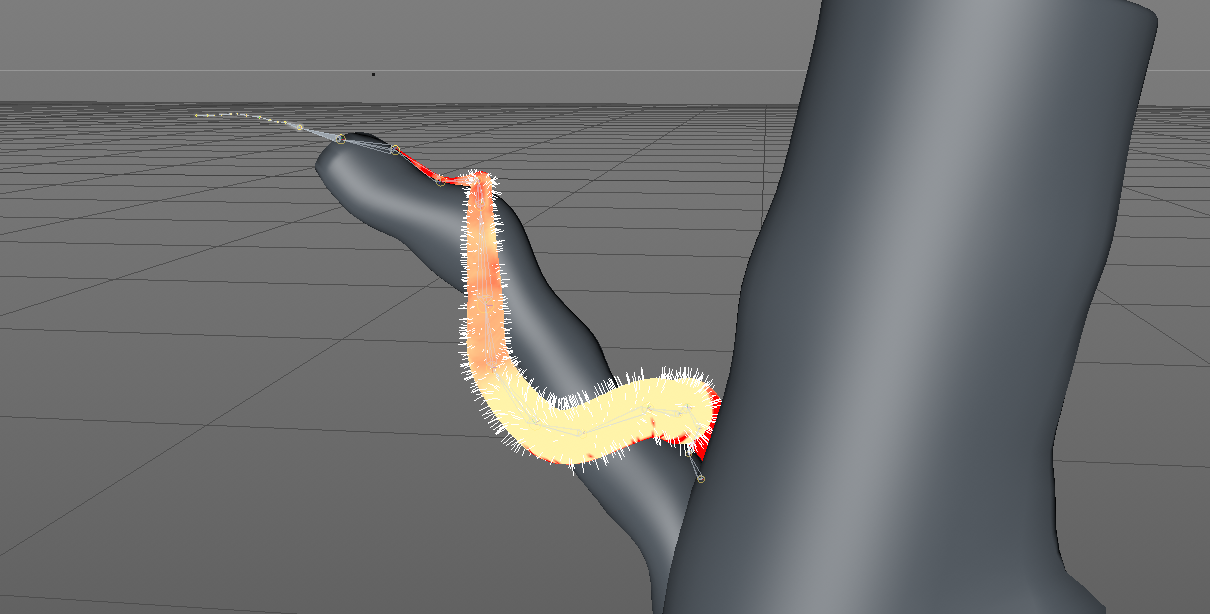
The idea was, to add tiny hair to the vines. This was not a problem for the static vines. I simply converted the Sweep object to a Polygon object and added fur. I changed the look of it with the Hair tools and the Hair material until satisfaction.
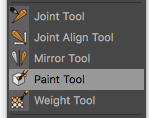
The moving vine, however, was more difficult, since you can not add hair to a Spline Wrap Effector. I discovered a solution to this problem fairly late while working on a different shot. I created a Vertex Map for the cylinder inside the Spline Wrap Effector and added the hair to it. Besides having hair on the model I also got another benefit from this: Selectively adding or removing hair is very easy with the Paint tool in the Character menu.
The Physical Renderer
After being satisfied with the look of the vines in a still frame, we discovered a problem with the standard Software Renderer. Despite having Anti Aliasing (AA) on maximum settings, the hair still flickered a lot. Because of AA, the render time per frame was also too high. Increasing the thickness of the hair did help with the flickering but also meant we had to settle for a different look. The solution for both our problems was the C4D Physical Renderer.
The Physical Renderer performed way better than the Software Renderer in terms of both the quality and the time it took to calculate each frame. Because of that, we basically halved the render time for this project. Still, we had to render each night for many weeks. Most of the time I used the “Automatic” setting inside the Physical Renderer settings and set the Error Threshold to 1%. The flickering was gone but a new problem occurred.
The Physical Renderer and the Hair Module
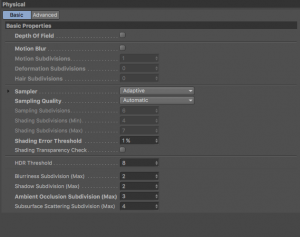 Sadly, the Physical Renderer has a bug while simulating hair. It loses them in certain frames. After a long search and a lot of trial and error, I discovered old forum posts that pushed me in the right direction. This bug is connected to the motion blur calculation. We did not have Motion Blur activated, but it still created problems. I had to activate the Motion Blur and set all the settings as low as possible and then deactivate it again. Otherwise, we were not able to bring back the hair for these frames. Motion blur was not necessary for our project, but you have to keep it in mind if you want to use both hair and this renderer.
Most of the time you add motion blur in the compositing if you have the right plug-ins for that.
It is always a good idea to render as a single image sequence. In our case, we chose OpenEXR in 32Bit. While rendering in single images, I was able to pause the export and it allowed me to only re-render the frames with missing hair.
Depending on how complex the shot was, we used different numbers of render passes because AE is not the best tool for multipass compositing. A render pass, for example, could just be the shadows of the scene. That gives you the possibility to independently adjust the strength of the shadows later in compositing. For this shot, I only chose to render the shadows and some Object buffer as single passes.
Compositing
Using the compositing file created in C4D beforehand, we quickly imported all the render passes into After Effects. The AE Composition, that was automatically generated, was not useable. I always built the passes manually from the ground up.
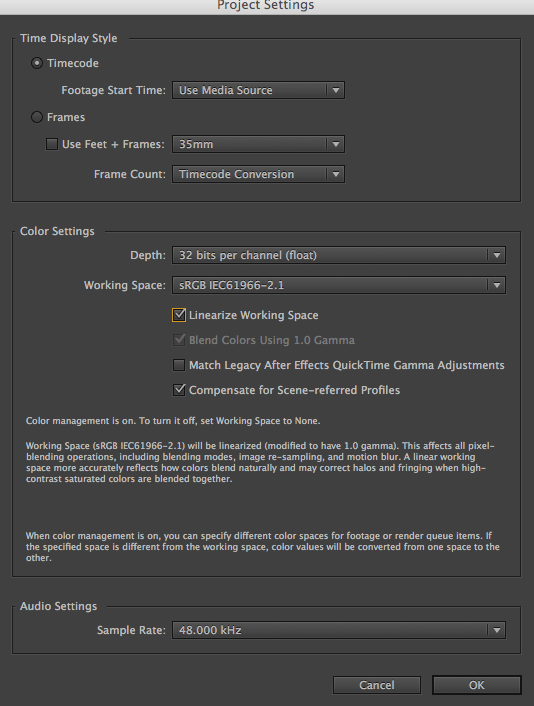 It is very important to set your project to “Linear“. This can be done in the Project-Settings in AE. There you set your colour depth and change your Working Space to sRGB. Beneath that, you need to check “Linearize Working Space“. Otherwise, it can not be guaranteed that AE will interpret the render passes correctly. C4D is automatically set to Linear workflow. All applications that are used in the workflow should operate in the same colour space.
I composited all the elements inside After Effects, adjusted the colours to match the plates and added noise and blur. Even if a plate looks completely in focus, the CG-Element will most certainly seem too sharp.
Once the VFX work was finished, all the footage was sent back to Blackmagicdesign DaVinci Resolve for a final grading. Then it was exported into Final Cut Pro X. More about editing and grading here.
Sculpting the vines
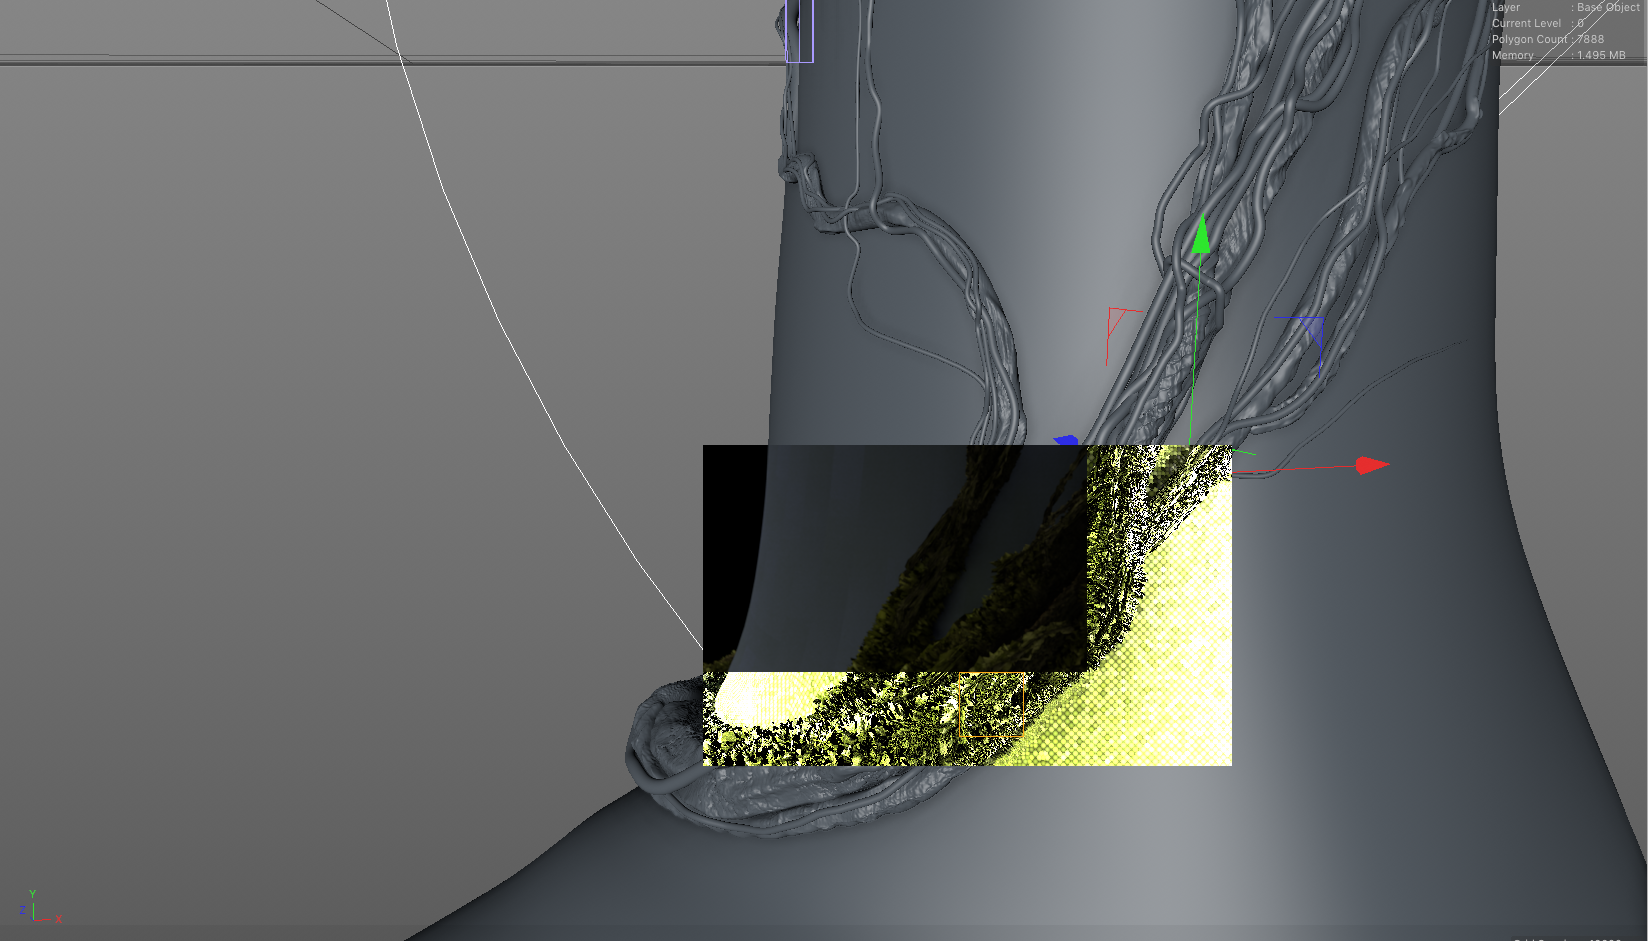
The bigger, more wood-like vines around the tree, were also added using the Hair script mentioned above. After we were happy with the placement of the vines, I duplicated them and used the Sculpting Tool to add as much detail and unique differences to them as possible. Even though the vines disappear behind haze most of the time, the details were worth it and make a difference. I added moss and other details using the Material Manager in C4D.
Bokeh in C4D
Blur was generated in C4D for the most part. This is not the “Industry Standard”, but generating Depth of Field inside AE was not possible without buying an additional plug-in. In theory, the Camera Lens Blur Effect is supposed to create blur based on a Depth Map from C4D, but it interprets these completely wrong. Using it in completely computer generated scenes is possible. But you can not use it for VFX with live action plates. We often rendered a version with lower settings, or a single frame, to check the blur against the real plate. We did not lose a lot of time using this method and I personally really like the Depth of Field in C4D.
Object-Tracking in C4D
The shot featuring a vine growing over the shoulder of our actress required us to generate an object tracking of the shoulder. The process of using the Object Tracker in C4D was pretty straightforward. I tracked the points manually in the Motion Tracker and assigned them to the Object Tracker. After that, I re-modelled the shoulder of our actress. Because the vine grows over a rather small and static area of the shoulder, the digital shoulder did not have to align perfectly everywhere. Next, I only had to animate the vine, using a spline and a Sweep object, but without any joints. The last step was to add hair and textures.
The tree, on the other hand, was harder to rebuild, because it is not perfectly round and has a lot of small bumps and features. Since we are constantly moving around the tree, it was a lot of trial and error until I got the model right.
Interaction between Actor and CGI
The shot that had the most iterations is the one were the vine and the hand of our actress touch. We tried tons of different looks and animations until we landed on the current one.
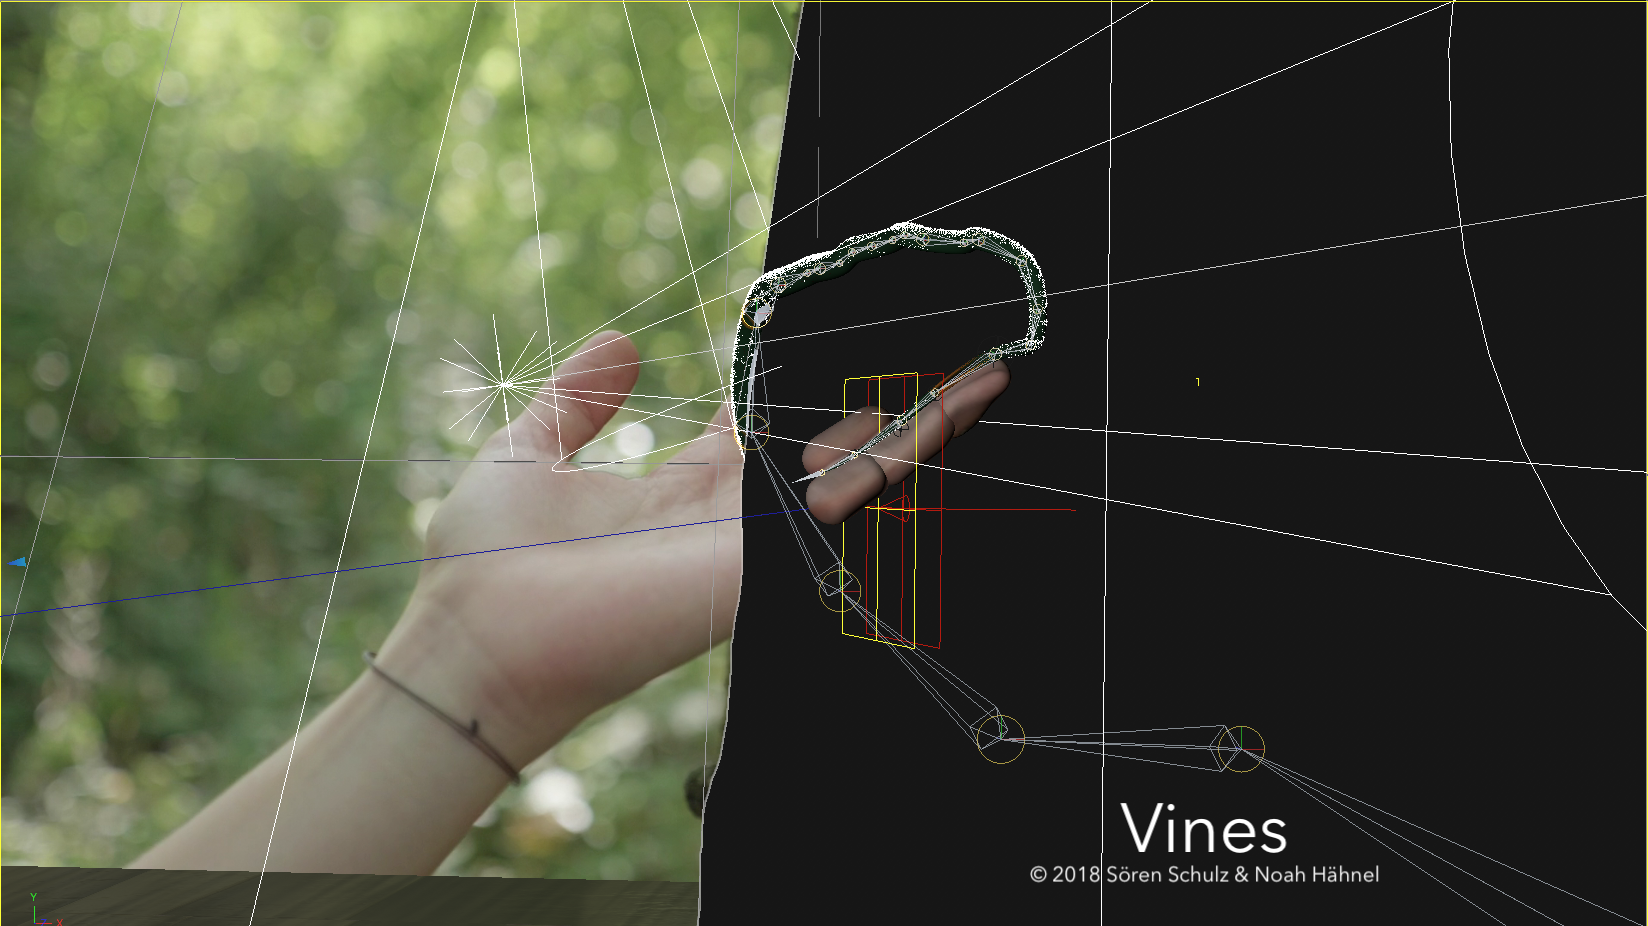
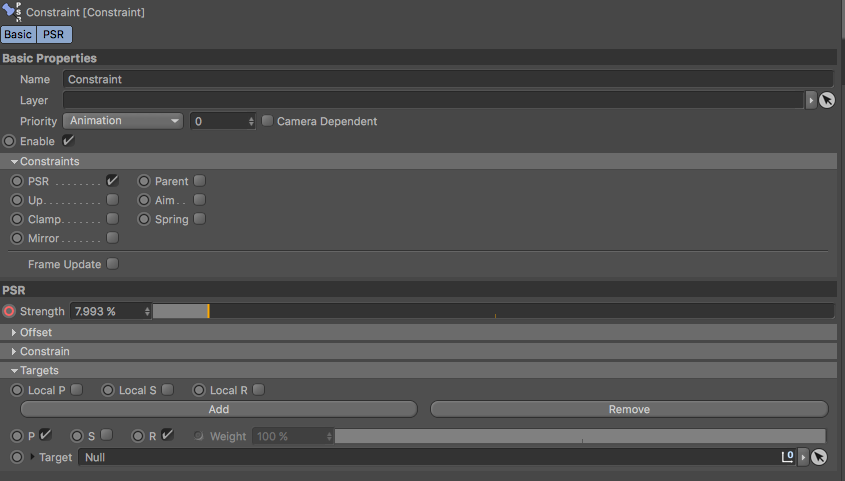 I built the fingers using different cylinders and animated those individually from each other to recreate the movement of the finger. The vine itself was animated using the same workflow as mentioned above. It had to stick to the finger, so I used the Constraint tag which I set to PSR (Position, Size, Rotation). As targets, I created Null objects and placed those on top of the cylinders, for additional animation possibilities. The last four joints of the vine rig have one of these Constraint tags.
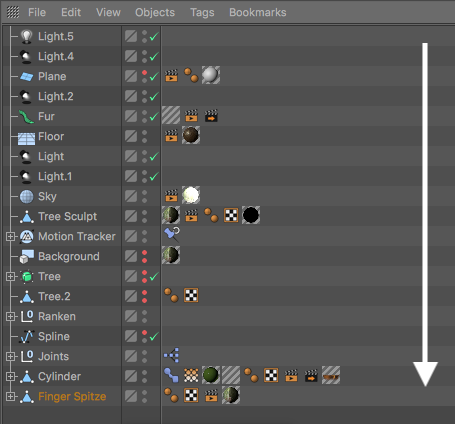
Using that many Joints and Expressions required me to be aware of one thing: The order in that these Expressions will be calculated. In the beginning, I had the problem that the vine was moving more slowly than the joints. Creating an exact animation was, therefore, not possible. I solved this problem in two steps. At first, I changed the priority of the Expressions by selecting the Constraint tag and changing the Priority to “Animation” (the sooner in the list, the sooner it will be calculated). Secondly, I took the joints and all the interacting objects and put them at the bottom of the Object list (the further down, the sooner it will be calculated). By using these two steps I managed to solve the problem.
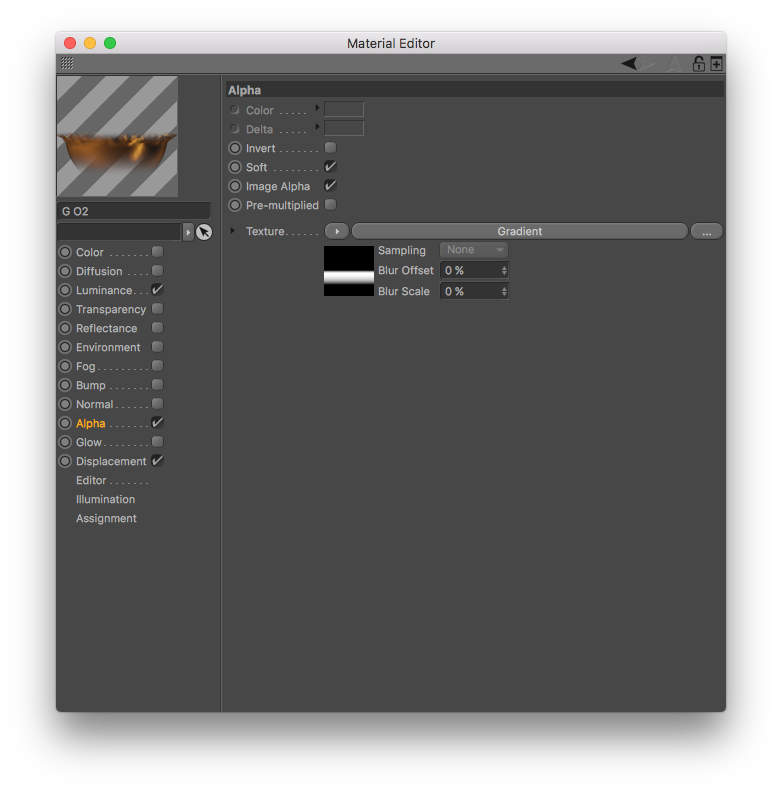
The gold that appears as soon as hand and vine touch, is simply animated using the Displacement and Alpha Channel inside the Material. I used a Pose Morph tag to get rid of the hair on the parts that turn to gold. I created two versions of the Vertex Map, that are responsible for the placement of the hair, and recorded those using the Pose Morph tag while animating the vanishing hair using the Morph Deformer as an effector.
Particles
From the beginning, we liked the idea of having particles swirling around in our shots. It took many versions until we were satisfied. The particles were supposed to look natural and enhance the depth of the scene. After many iterations, we decided to give them unique irregularities, that gave them a realistic randomness. Even though you barely see them in some shots, they still create a beautiful fairytale-like atmosphere. I also tracked all of these shots inside C4D and rendered the particles with the Physical Renderer. This actually saves time, because I only rendered the actual frame size, instead of having to create a much larger one that the camera in AE would pan over.
Retouching
I had to do some retouching in several shots, like removing people, tracking points or changing parts of the background.
To remove the people, I simply used the Clone Stamp, drew over the problematic area and tracked that still image onto the shot.
In two shots our actress is supposed to walk through a thick forest, but you can see an open patch of grass in the background. I tracked these shots in AE and changed the background with Photoshop. To keep as much of the original footage as possible, I used a Luminance Key. This worked pretty well because the grass was overexposed.
I used a fairly “unprofessional” solution – the Wire Removal Effect – to get rid of the tracking points on her shoulder. The points were moved by hand. Normally you would draw over each frame, but this would have cost too much time and was not necessary in this case.
Rotoscoping
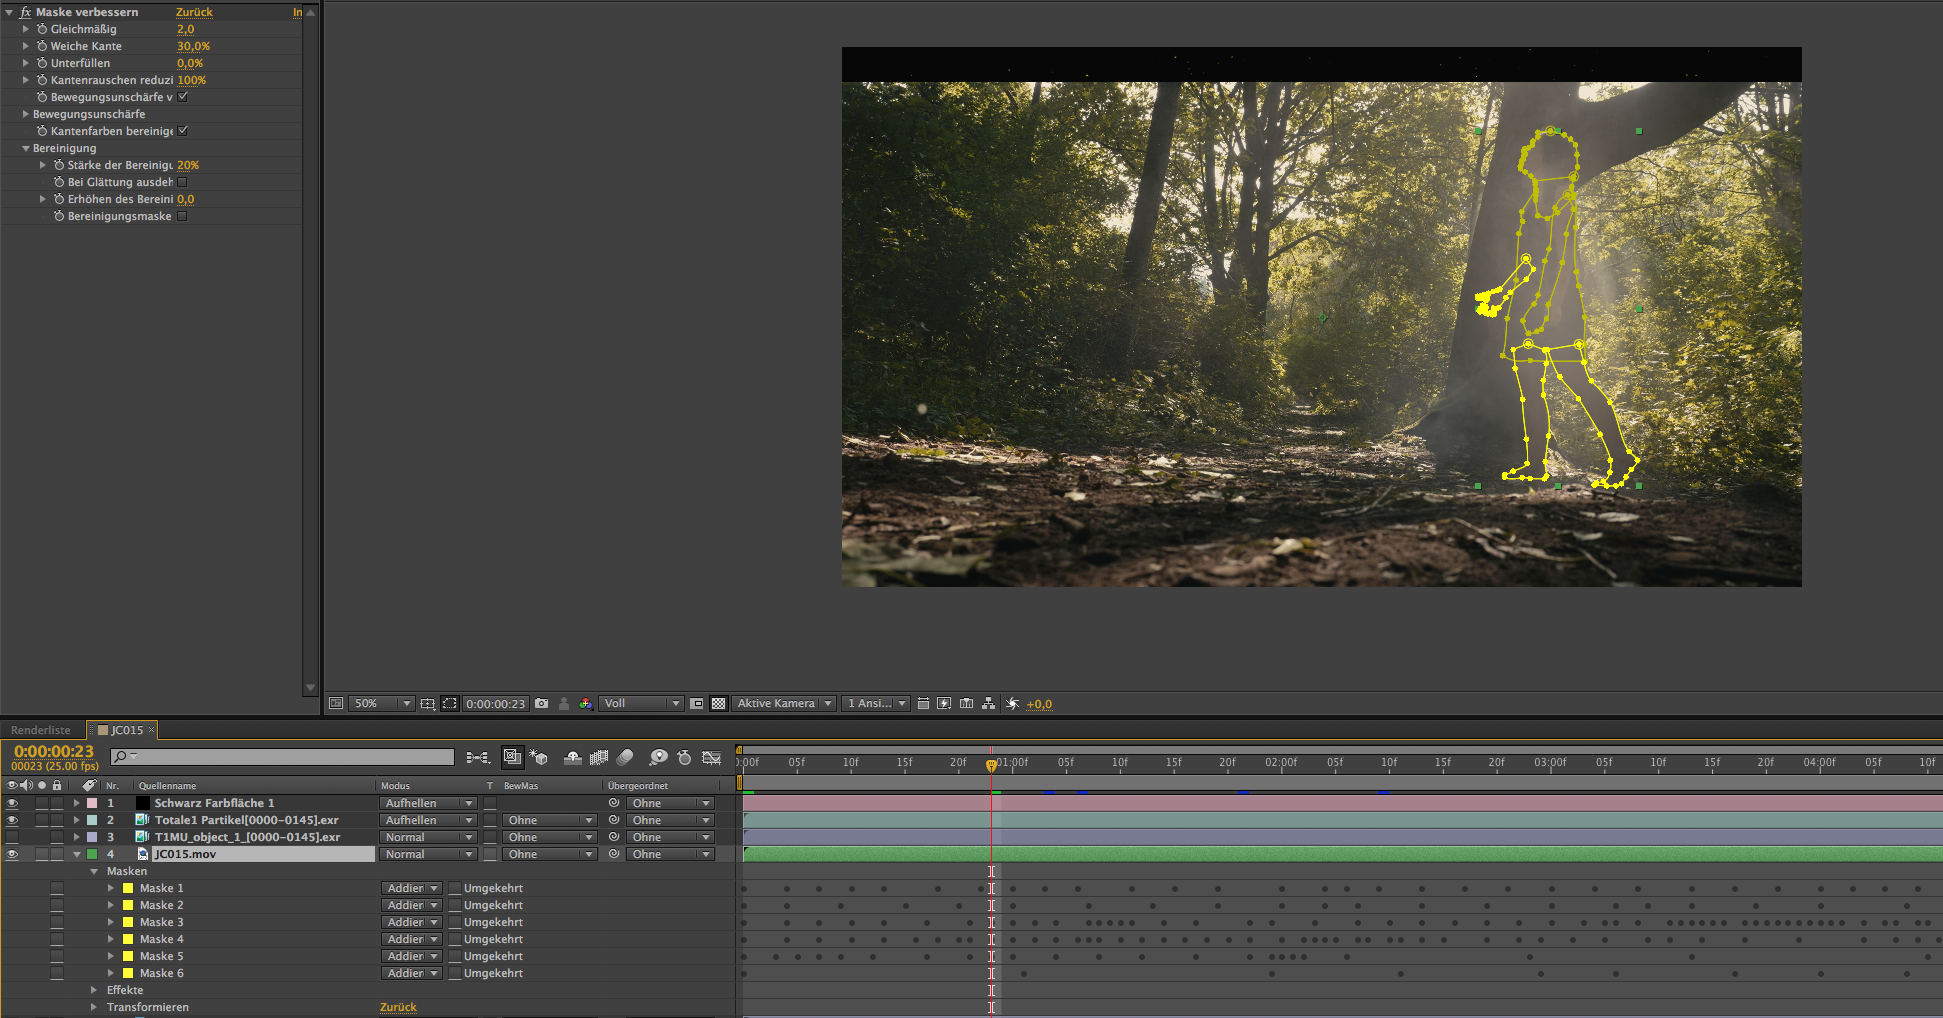
Each shot that featured our actress moving in front of CGI elements (e.g. particles, digital haze, the vine or background replacement) had to be rotoscoped.
To tackle rotoscoping I used every tool that AE provides. For the most part, I used the normal masks. Masking the body parts individually let me work more efficiently. On top of that, I used the “Refine Matte” Effect to smooth the edges and add motion blur.
In some cases, I was able to use the Roto Brush. This tool can make rotoscoping easier for certain shots that have clear edges around the object or person you need to isolate. If the edges are not that clear though, I recommend using the mask tool before wasting time with the Roto Brush. I used the Roto Brush, for example, in the shot where hand and vine touch. I still had to mask out the fingernails manually because the tool simply ignored them on each frame.
For the last shot, I used the AE version of the planar tracker Mocha, to isolate the tree and place it in front of the digital haze.
Real and digital Haze
On location, we used practical haze, for which we employed Atmosphere Aerosol, also known as “Haze in a Can”. You can soon read more about it here.
We complemented the real haze with additional digital haze and fog in postproduction. Sometimes I used real footage of fog, but most of the time using “Turbulent Noise” was satisfactory for this purpose. I animated/transformed the Noise Map based on the movement of the real haze.
The fog that emerges out of the forest path at the beginning of the film, is a simulation done with TurbulenceFD (TFD) inside C4D.
While shooting, we were a bit worried about how to put the CG vines behind the real haze, but that was thankfully not a problem. I just played around with blending modes and animated the opacity of the vines according to the strength of the fog.
Rendertimes
System Specifications:
- iMac (27-inch, Late 2012)
- 3,4 GHz Intel Core i7
- 32 GB 1600 MHz DDR3
- NVIDIA GeForce GTX 680MX 2048 MB
Because the render times were extremely high, I had to play around with the render settings to find a good balance between quality and render time. This had to be done individually for each shot. Sometimes, I was able to reduce the SSS calculations, other times, I could reduce the resolution the shadows. A general tip to decrease render times is: Only render the relevant part of the image. For that, I went into the render settings and checked “Render Region” in the Output settings. There I set the relevant image section. Even rendering “nothing” takes time. Shots that contain 200+ frames will benefit from decreasing render times per image even by a few seconds.
The final version of the pan onto the vine took around 8.5 hours to render, excluding the static vines on the tree. The shot with hand and vine interacting calculated over 48 hours. You need to be aware of the render times for such a project. The times above do not include test renderings or faulty exports.
Conclusion: VFX made in Cinema 4D
Is Maxon Cinema 4D a viable choice for VFX in film?
Our answer would be yes. Most commonly, Cinema 4D is used to create Motion Graphics. Maxon did, however, add a lot of tools for VFX Artists that really come in handy. Particularly low budget productions will benefit from the huge variety of tools that Cinema 4D will give you out of the box. We did not have to use any additional plug-ins besides TFD. Especially the Motion/Object Tracker is a huge highlight for me, because it always managed to give me a great camera solve at the end.
What are your experiences with VFX and C4D? Did you encounter similar problems or do you have different solutions? I am happy to answer questions/comments.
- Click here to read more about pre- and production in Part 1
- Click here to read more about editing and colour grading in Part 2
- Click here to read the VFX-Blog of VFX-Supervisor Noah Hähnel
- Click here to read about our first VFX test for VINES
- Click here to read about our autofocus test on the GH5 for VINES
- Click here to read about our Ikan Beholder EC1 Gimbal Test for VINES
- Click here to see some 3D-printed jewelry by Noah Hähnel
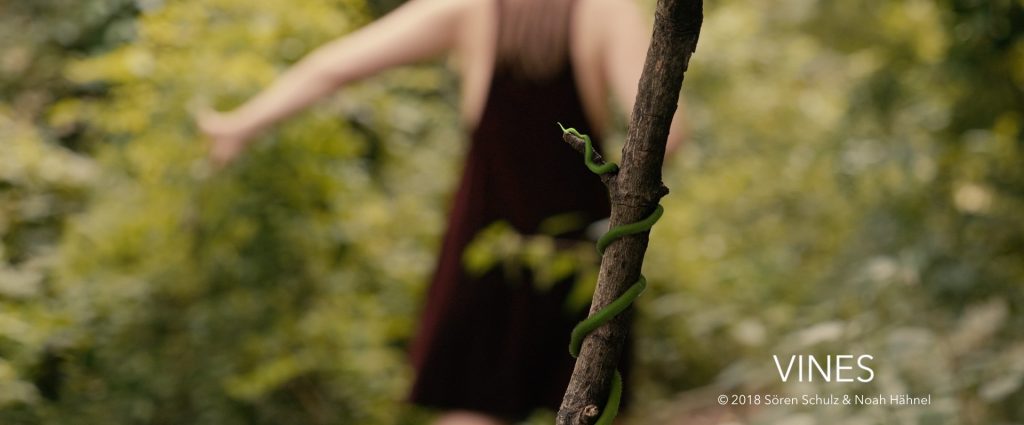
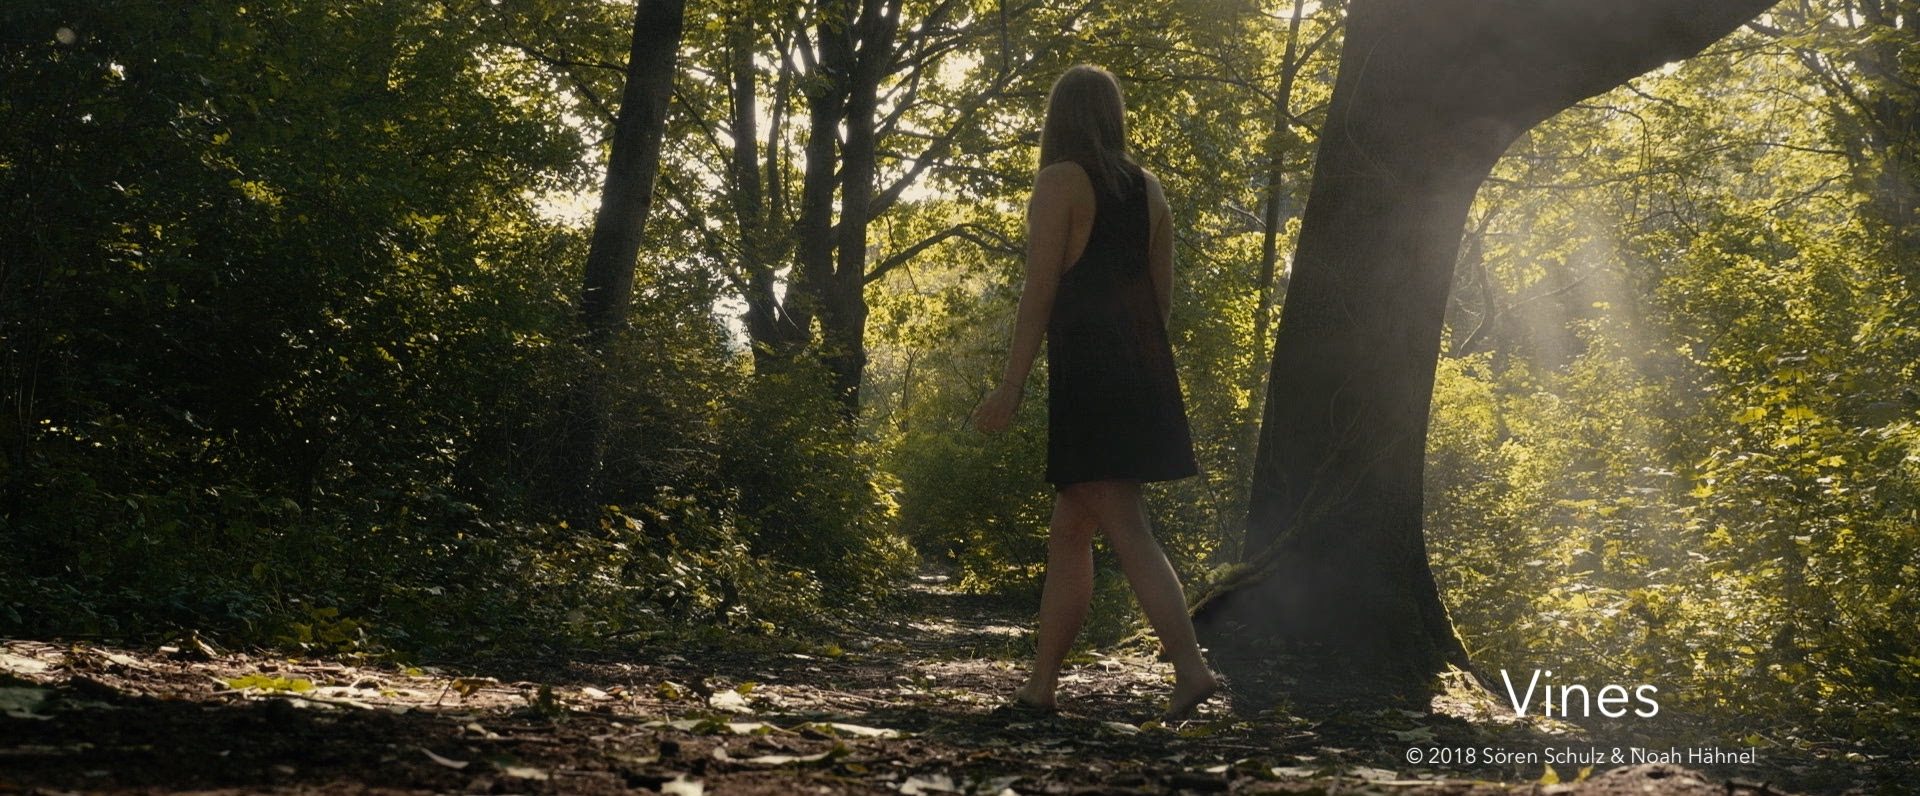
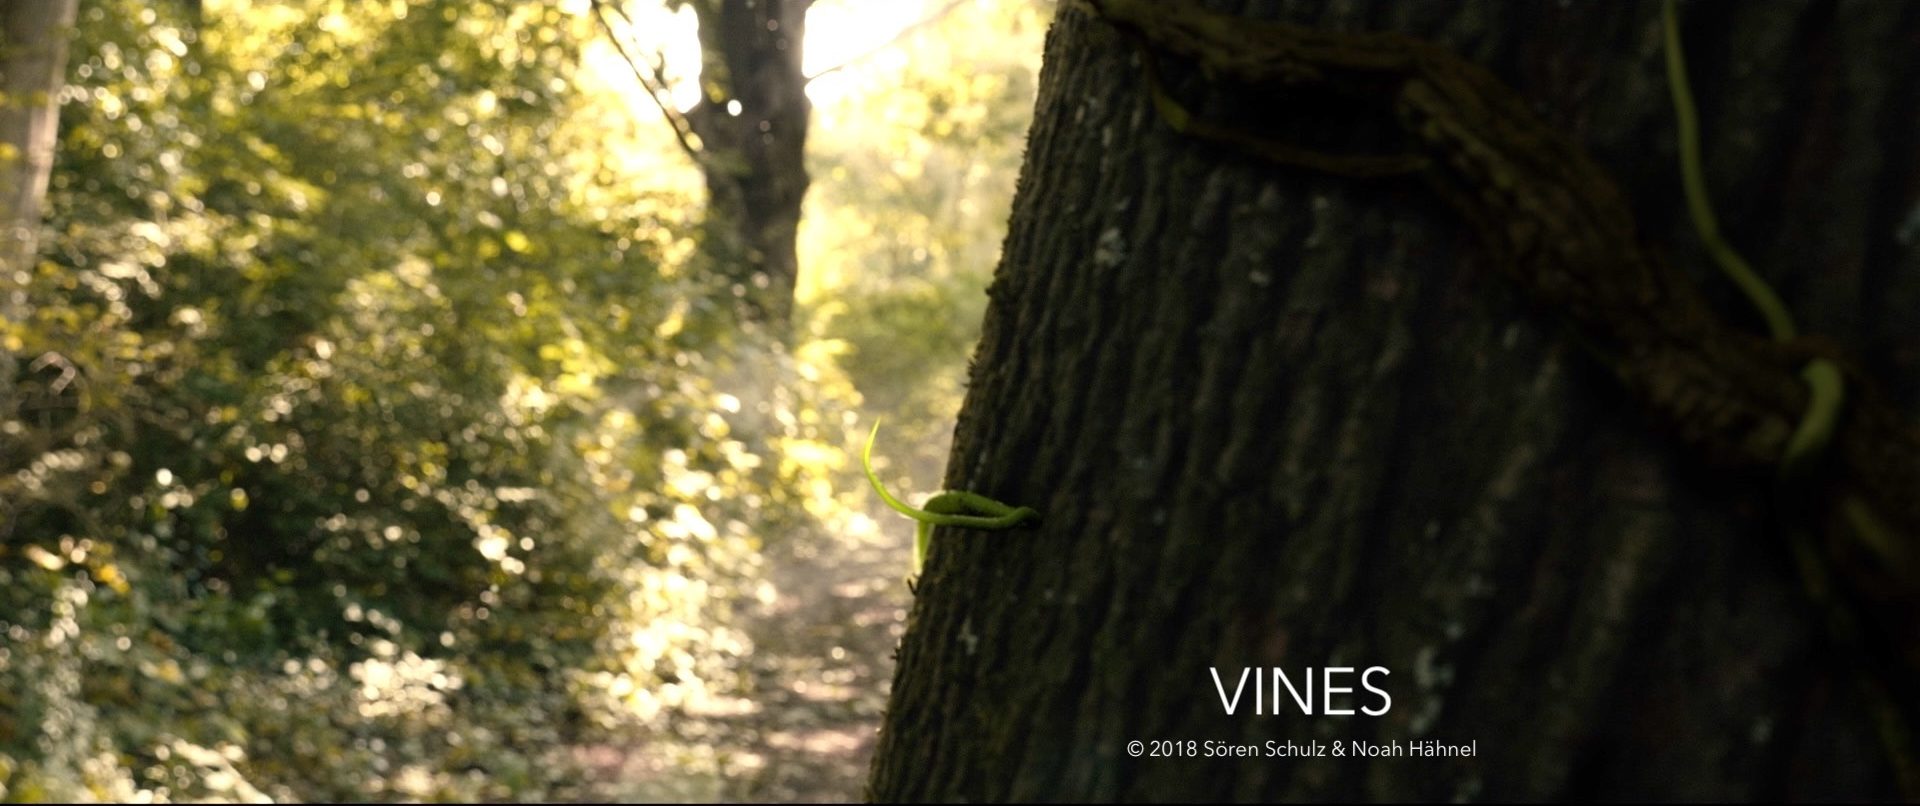

[…] In general Atmosphere Aerosol helped us create a beautiful scenery. A few shots were enhanced with digital fog in postproduction. (Click here to read our in-depth post about the VFX in “Vines”) […]